
Wet Bar with Sink: The Complete Buying & Design Guide
Everything you need to plan, choose, and enjoy a wet bar with a sink — from compact basement units to full entertaining stations with cabinetry, countertops, and smart storage.
Explore Wet Bar OptionsA wet bar with a sink transforms an unused corner, a basement wall, or a stretch of open-plan living space into a true entertaining hub. Unlike a simple console or a drinks trolley, a wet bar with sink brings running water, drainage, and dedicated storage together in one place — so you can mix, pour, rinse, and serve without walking back and forth to the kitchen.
If you are researching this purchase, you probably already know you want a dedicated bar area. What you need now is clarity: what size fits your room, whether your plumbing can support a sink, which materials hold up to spills and ice, and how to avoid the most common planning mistakes. This guide walks through each decision in plain language so you can buy with confidence.
Quick orientation: A wet bar with sink is defined by three things — a countertop work surface, cabinetry or shelving for storage, and a plumbed sink with a water supply and drain. Everything else (beverage fridge, ice maker, glass rinser, open shelving) is an add-on that you can scale up or down based on space and how you entertain.
What Exactly Is a Wet Bar with Sink?
A wet bar with sink is a dedicated beverage and serving station that includes a working sink. The sink is the feature that separates a true wet bar from a dry bar, a console table, or a simple cabinet. With running water on hand, you can rinse glassware between pours, wash bar tools, prep garnishes, and clean up without carrying everything to the kitchen.
Most wet bars combine four functional zones:
- Prep and wash zone — the sink, faucet, and a small area of countertop for cutting citrus or opening bottles.
- Mix and pour zone — a clear countertop section for shaking cocktails, opening wine, or setting out glasses.
- Storage zone — cabinets and drawers for bottles, bar tools, napkins, and glassware.
- Service zone — often an open counter edge or a pull-out shelf where guests can set down a glass.
Wet bars appear in many forms: built-in cabinetry with a stone countertop, prefabricated bar cabinets that arrive as a single unit, and compact basement bars designed to fit under a stairwell or along a short wall. The right form depends on your room, your plumbing access, and how much storage you need.
Recommended Wet Bar with Sink Products
⚠️ AFFILIATE DISCLOSURE: This website contains affiliate links. As an affiliate Associate, we earn from qualifying purchases. If you make a purchase through these links, we may receive a small commission at no additional cost to you. Read our full affiliate policy.

Jocisland 72-Inch Stainless Steel Utility Sink Cabinet with Faucet | Food-Grade Commercial Sink, 72 x 24 x 34 In, Waste Hole, Large Storage, for Restaurant, Bar and Laundry Room
Check price on Amazon
Summit 68.5" Bar Cabinet, Navy Blue- OASISMN33 | wIncludes Beverage Centerwith Wine Storage,Wet Bar, All in One Bar with Refrigerator and Sink, ADA Compliant
Check price on Amazon
LUCKWIND 48" Iron Utility Sink Cabinet w/Stainless Steel Sink & Faucet, 2-Door Enclosed Storage Cabinet and 2-Shelf Open Unit for Outdoor Patio, Kitchen & Commercial Use
Check price on Amazon
Tuhome Napoles 39 in Kitchen Sink Cabinet and Utility Sink, Stainless Steel Top and Drainboard, Freestanding Laundry Base, 2 Doors, 1 Shelf, Kitchenette, 39.3 x 19.7 x 35.4 in, White and Light Grey
Check price on Amazon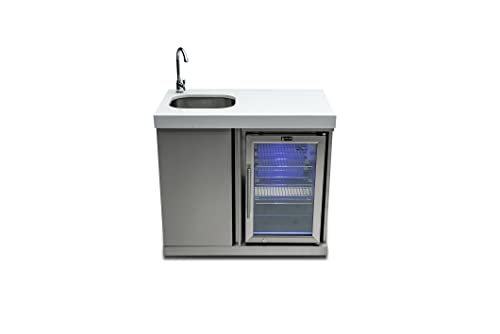
Mont Alpi 38" Outdoor Beverage Center with Sink and 2.7 Cu Ft Fridge
Check price on Amazon
Tuhome Napoles 39 in Kitchen Sink Cabinet and Utility Sink, Stainless Steel Top and Drainboard, Freestanding Laundry Base, 2 Doors, 1 Shelf, 39.3 x 19.7 x 35.4 in, White, Faucet Not Included
Check price on Amazon
SIMPLIHOME Modern Wide Shaker 46" Dual-Sink Laundry Cabinet in Pure White | Dual stainless steel sinks, pull-out faucet, 1-door cabinet and functional drawer; transitional utility for laundry rooms.
Check price on AmazonTypes of Wet Bars with Sinks
Wet bars are commonly grouped into three broad categories. Each has a different footprint, installation path, and best-use scenario.
Built-In Cabinetry Wet Bar
A built-in wet bar is designed and installed as part of the room, usually with custom or semi-custom cabinetry, a fitted countertop, and a sink cutout. This is the most flexible option because you can tailor the height, depth, storage layout, and countertop material to your space and style. Built-ins are common in finished basements, dining room alcoves, and open-plan living areas where the bar should look like a natural extension of the architecture.
Built-ins require more planning: you need accurate measurements, a plumbing rough-in, and usually a countertop fabricator. In return, you get a seamless look, maximum storage, and the ability to integrate appliances such as a beverage fridge or ice maker.
Prefabricated Bar Cabinet with Sink
A prefabricated wet bar cabinet arrives as a self-contained unit — often with a countertop, a small sink, a faucet, and interior storage already assembled. These units are a good fit for apartments, smaller homes, and spaces where custom carpentry is not practical. Installation is usually faster, but you still need a nearby water supply and drain, and the sink location is fixed by the cabinet design.
When comparing prefabricated units, look at the cabinet depth, the sink bowl size, and whether the unit is designed for a built-in or freestanding placement. Some models are designed to sit against a wall and can be trimmed with a matching panel to look built-in.
Compact and Basement Wet Bars
Compact wet bars are scaled-down stations designed for tight spaces. They often pair a narrow cabinet with a small round or rectangular sink. Basement wet bars deserve special attention because drainage may require a sewage ejector pump or an up-flush system if the floor is below the main sewer line. A plumber should assess the drain path before you commit to a layout.
For basement projects, plan the bar near an existing water line or utility wall when possible. Grouping the sink, any appliances, and electrical outlets along one wall simplifies rough-in work and keeps the installation efficient.
Sizing Your Wet Bar: How Much Space Do You Need?
Sizing is the decision that most often determines whether a wet bar feels generous or cramped. As a working guide, think in terms of counter run — the linear length of usable countertop along the wall.
| Tier | Counter Run | Typical Layout | Best For |
|---|---|---|---|
| Compact / Starter Tier | 36–48 inches | Small sink plus one cabinet stack; minimal landing space | Apartments, tight corners, secondary beverage stations |
| Mid-Tier | 48–72 inches | Sink, prep landing, drawers, and space for a beverage fridge | Dining room alcoves, family rooms, casual entertaining |
| High-End Tier | 72–96 inches | Full bar with sink, ice maker, fridge, glass storage, and open shelving | Basements, open-plan great rooms, frequent hosts |
| Luxury / Commercial-Grade | 96+ inches | Extended run with dual zones, back bar, and dedicated service area | Entertainment rooms, large homes, serious collectors |
Beyond the counter run, keep these dimensions in mind:
- Counter height: Standard bar height is typically 42 inches, while counter height is around 36 inches. Choose based on the stools you plan to use and whether the bar is primarily for standing guests or seated service.
- Counter depth: A comfortable bar counter is usually 18–24 inches deep. Deeper counters give more landing space but can crowd a narrow room.
- Aisle clearance: Allow at least 36 inches of clear floor space in front of the bar for a single person to work, and 42–48 inches if guests will stand or stools will be pulled out.
- Sink clearance: Leave at least 12–18 inches of counter on at least one side of the sink for landing glassware and tools.
If your room is tight, consider a wet bar with a shallow cabinet and a small sink rather than forcing a full-depth unit. A well-planned compact bar will feel more useful than an oversized one that blocks circulation.
Plumbing and Installation Requirements
The sink is the defining feature of a wet bar, and it is also the part that requires the most planning. A wet bar sink needs a cold water supply line and a drain connection. Many homeowners also add a small water heater or a hot water line for washing glassware, though cold water is sufficient for most bar tasks.
Supply and Drain Basics
Supply lines are typically 3/8-inch or 1/2-inch flexible lines connected to a nearby water pipe. Drains are usually 1.5-inch lines that must slope correctly toward the main drain. The trap under the sink should be accessible for cleaning and leak checks, so avoid sealing it permanently behind cabinetry.
Basement and Below-Grade Drainage
If the wet bar is below the main sewer line, gravity drainage may not be possible. In that case, a sewage ejector pump or an up-flush system is used to move wastewater upward to the main drain. These systems need electrical power, proper venting, and regular maintenance. A licensed plumber should specify the pump capacity and confirm local code requirements.
Venting and Code Compliance
Every sink drain needs proper venting to prevent sewer gases from entering the home and to allow smooth drainage. In remodeling situations, an air admittance valve (AAV) can sometimes be used when traditional venting is impractical, but local codes vary. Always confirm with your plumber and local building department before rough-in work begins.
Electrical needs are also worth planning early. Outlets for a beverage fridge, blender, or ice maker should be on dedicated circuits where required, and any outlets near the sink should be GFCI-protected.
Installation planning tip: Before buying a wet bar cabinet or sink, photograph the area behind the wall where the bar will go. Locate existing water lines, drains, and outlets. A plumber can often give a preliminary assessment from photos and measurements, which helps you rule out layouts that would require major demolition.
Materials: Countertops, Cabinets, and Sinks
Wet bar materials need to handle moisture, spills, condensation, and frequent wiping. The right combination depends on your style preference and how heavily the bar will be used.
Countertop Materials
- Quartz and solid surface: Non-porous and easy to clean, making them a strong choice for wet zones. Quartz offers a wide range of colors and patterns and resists staining well.
- Granite and natural stone: Durable and distinctive, but natural stone should be sealed to resist moisture and staining. Sealing needs periodic renewal.
- Butcher block and wood: Warm and casual, but wood requires regular sealing and prompt drying to prevent water damage. Best for low-moisture, light-use bars.
- Stainless steel: Commercial-grade appearance and highly durable. Ideal for heavy use and a modern or industrial design scheme.
Cabinet Construction
Look for plywood or moisture-resistant cabinet boxes rather than particleboard in wet zones. Dovetail or doweled drawer joints and full-extension glides improve durability. In humid basement environments, sealed edges and a moisture-resistant finish extend the life of the cabinetry.
Sink Styles and Materials
Bar sinks are typically smaller and shallower than kitchen sinks. Popular materials include stainless steel, fireclay, and composite. Undermount sinks simplify countertop wiping, while drop-in sinks are simpler to install. A single-bowl rectangular sink is the most versatile for rinsing glassware and tools; a small round sink can work in compact units. Pair the sink with a faucet that has enough clearance for pitchers and a sprayer if you plan to rinse often.
Design Ideas and Layout Tips
A wet bar should feel intentional rather than like an afterthought. These design principles help you get a result that is both attractive and practical.
Place the Sink Where It Works
Put the sink slightly off-center rather than dead-center in the counter run. This gives you a larger uninterrupted prep area on one side and keeps the faucet from dominating the visual composition. If the bar is visible from a living area, keep the faucet profile slim and choose a finish that matches the room's hardware.
Layer Lighting
Wet bars benefit from three lighting layers: general ambient light, task lighting over the sink and prep area, and accent lighting inside or under cabinets. Under-cabinet lighting is especially useful for showing off glassware and bottles while adding a warm glow in the evening.
Mix Open and Closed Storage
Closed drawers keep clutter out of sight, while a section of open shelving or a glass-front cabinet displays bottles and glassware. A balance of both feels curated rather than crowded. Include at least one deep drawer for tall bottles and one shallow drawer for bar tools, napkins, and coasters.
Add a Focal Detail
A distinctive backsplash, a floating shelf, a decorative mirror, or a statement faucet can give the bar personality without requiring a large footprint. If the bar sits in an open-plan room, choose a detail that echoes the adjacent kitchen or dining area so the spaces feel connected.
Connect to Adjacent Spaces
If your wet bar is near a dining room or patio, consider how the flow works for guests. A bar positioned between the kitchen and dining area can serve both spaces. If the bar opens to an outdoor area, choose materials that tolerate humidity and temperature swings, and consider an outdoor-rated sink and faucet.
Pre-Purchase Checklist
- Measure the available wall length, counter depth, and floor clearance in front of the bar.
- Locate the nearest water supply and drain; photograph the wall and confirm access with a plumber.
- Decide whether the bar will be built-in, prefabricated, or a compact basement unit.
- Choose a counter height that matches your stools and service style.
- Select a sink size and material that suits how often you rinse glassware and tools.
- Confirm electrical needs for any beverage fridge, ice maker, or lighting.
- Check local code requirements for venting, GFCI outlets, and below-grade drainage.
- Plan storage for bottles, glassware, and bar tools before finalizing the cabinet layout.
- Choose moisture-resistant materials for cabinets and countertops.
- Review the warranty and return policy for prefabricated units before ordering.
Common Mistakes to Avoid
Skipping the plumbing assessment. The most common wet bar regret is discovering too late that the drain requires a pump or that the wall cannot be opened without major work. Get plumbing input before you finalize the design.
Choosing a sink that is too small. A tiny sink may look neat on paper but can be frustrating when rinsing pitchers or cleaning shakers. Select a bowl size that matches your actual bar tasks.
Underestimating storage. Bottles, glassware, and tools take up more space than expected. Include at least one deep drawer and one tall cabinet section for bottles.
Ignoring the landing zone. A sink with no counter space beside it forces you to balance glasses on the edge. Reserve 12–18 inches of landing space on at least one side.
Forgetting ventilation and moisture control. In basements and enclosed rooms, plan for ventilation and moisture management to protect cabinetry and finishes. A small exhaust fan or a dehumidifier may be needed depending on the space.
Frequently Asked Questions
What is a wet bar with a sink?
A wet bar with a sink is a built-in or freestanding entertaining station that combines a countertop, cabinetry, and a plumbed sink for mixing drinks, rinsing glassware, and food prep. It typically also offers storage for bottles, bar tools, and glassware, making it a self-contained beverage and serving hub.
Do I need a plumber to install a wet bar sink?
Yes. A wet bar sink requires a water supply line and a drain connection, so professional plumbing work is strongly recommended. Some prefabricated units can be connected to existing nearby plumbing, but a licensed plumber should handle the rough-in and final connections to ensure code compliance and prevent leaks.
What is the ideal size for a wet bar with a sink?
A compact wet bar with a sink typically needs a counter run of about 36 to 48 inches to accommodate a small sink and minimal storage. Mid-range setups often run 48 to 72 inches, while larger entertaining stations can exceed 72 inches to include a beverage fridge, ice maker, and generous cabinet storage.
Can a wet bar sink be installed in a basement?
Yes, but basement installations usually require a sewage ejector pump or an up-flush system if the drain is below the main sewer line. A plumber can determine whether gravity drainage is possible or if a pump system is needed, along with proper venting.
What materials are best for a wet bar countertop?
Quartz, granite, and solid surface materials are excellent choices because they resist moisture and stains. Butcher block and sealed wood offer warmth but need more maintenance, while stainless steel provides a commercial-grade look and high durability for heavy use.
How do I maintain a wet bar with a sink?
Rinse and dry the sink after each use to prevent mineral buildup and staining. Clean the drain regularly to avoid clogs, wipe down the countertop with a suitable cleaner, and check supply lines and connections periodically for leaks. For wood surfaces, reseal as recommended by the manufacturer.
Ready to Choose Your Wet Bar with Sink?
You now have the framework to select a size, plan the plumbing, and choose materials that will last. Browse the recommended wet bar units above, compare features against the checklist, and move forward with a plan that fits your space and the way you entertain.
Compare Wet Bar Options